20
Apr
Easter Bunny Treat Jars
Categories:
Inspiration
Satu lagi yang bisa kamu bikin untuk dekorasi saat Easter, jar dengan siluet bunny atau kelinci.
Coba yuk, bikin seperti dibawah ini.
Sumber : https://www.countryliving.com/diy-crafts/how-to/g524/easter-fun-stuff-0406/?slide=6
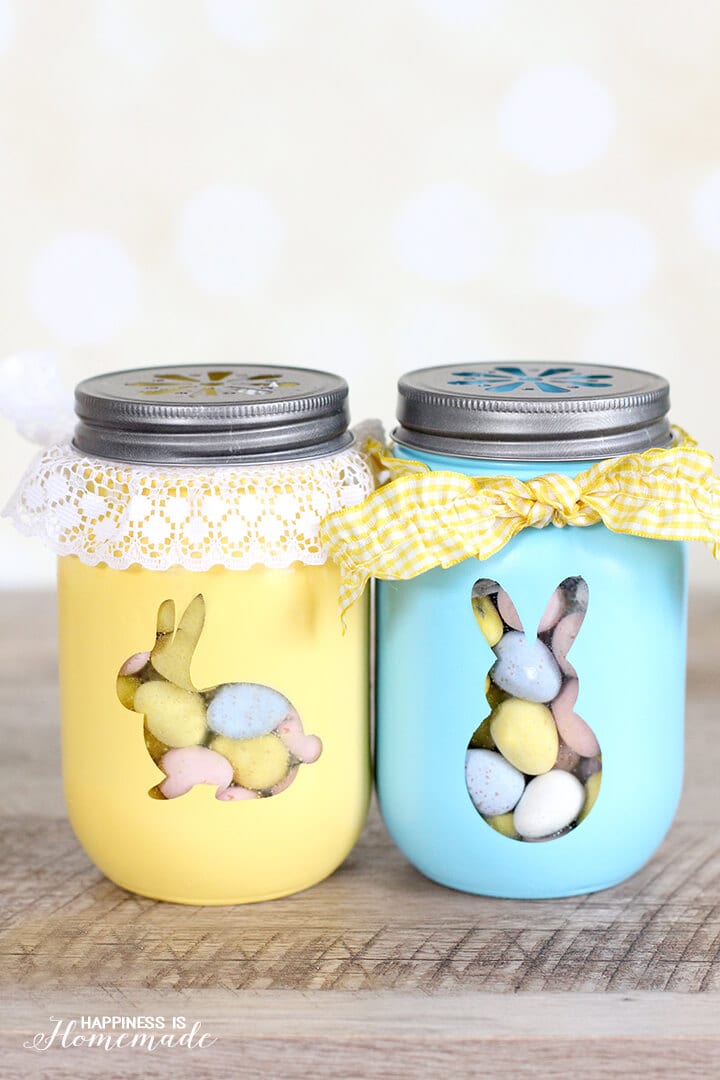
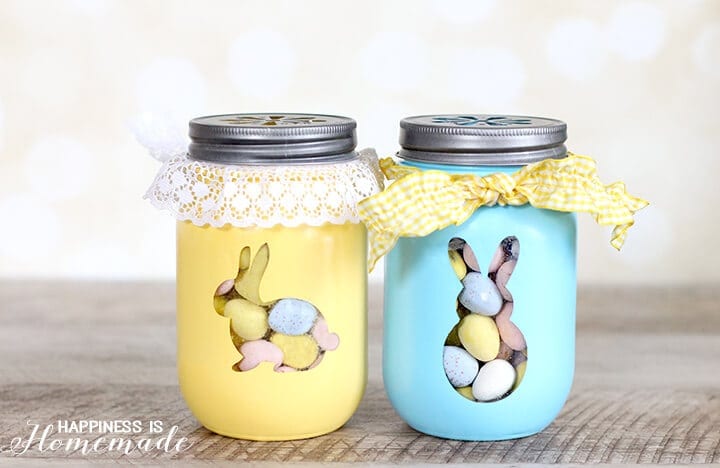
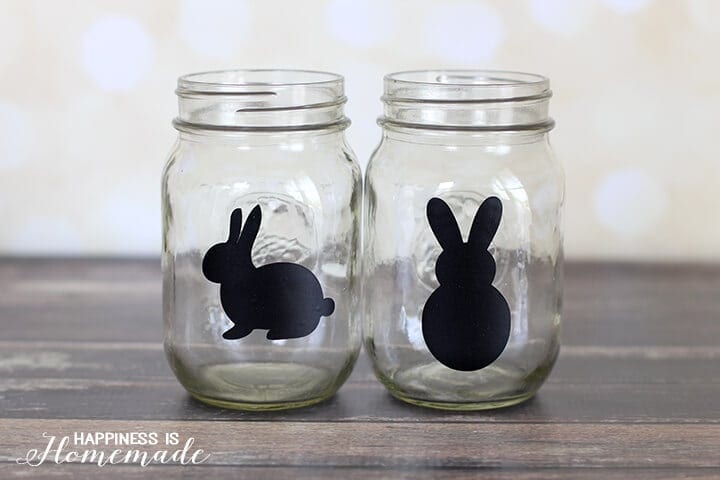 Start with clean glass mason jars and vinyl stickers. I cut these adorable bunny stickers using my Silhouette CAMEO and bunny shapes from the Silhouette Store (#16785 and #58555). Apply the stickers to the smooth side of the jar, and press firmly on the edges to make sure they’re completely adhered to the glass. Apply a coat of Chalky Finish paint, allow to dry for 10 minutes, and then carefully peel up the vinyl stickers while the paint is still slightly wet. Spray paint will also work; however, when using spray paint, be sure that the glass jar is placed upside down so that no paint gets inside of the jar!
Add a ribbon or some lace trim, and it’s all ready for gifting. Easy peasy! [ ... ]
Start with clean glass mason jars and vinyl stickers. I cut these adorable bunny stickers using my Silhouette CAMEO and bunny shapes from the Silhouette Store (#16785 and #58555). Apply the stickers to the smooth side of the jar, and press firmly on the edges to make sure they’re completely adhered to the glass. Apply a coat of Chalky Finish paint, allow to dry for 10 minutes, and then carefully peel up the vinyl stickers while the paint is still slightly wet. Spray paint will also work; however, when using spray paint, be sure that the glass jar is placed upside down so that no paint gets inside of the jar!
Add a ribbon or some lace trim, and it’s all ready for gifting. Easy peasy! [ ... ]
Read More
These cute Easter bunny treat jars are a sweet way to deliver a little bit of springtime cheer to your loved ones. Fill them with candy, fresh flowers, a DIY candle or homemade sugar scrub for a quick and easy gift idea that’s sure to please.
These cute Easter bunny treat jars are a sweet way to deliver a little bit of springtime cheer to your loved ones. Fill them with candy, fresh flowers, a DIY candle or homemade sugar scrub for a quick and easy gift idea that’s sure to please.
Start with clean glass mason jars and vinyl stickers. I cut these adorable bunny stickers using my Silhouette CAMEO and bunny shapes from the Silhouette Store (#16785 and #58555). Apply the stickers to the smooth side of the jar, and press firmly on the edges to make sure they’re completely adhered to the glass. Apply a coat of Chalky Finish paint, allow to dry for 10 minutes, and then carefully peel up the vinyl stickers while the paint is still slightly wet. Spray paint will also work; however, when using spray paint, be sure that the glass jar is placed upside down so that no paint gets inside of the jar!
Add a ribbon or some lace trim, and it’s all ready for gifting. Easy peasy! [ ... ] 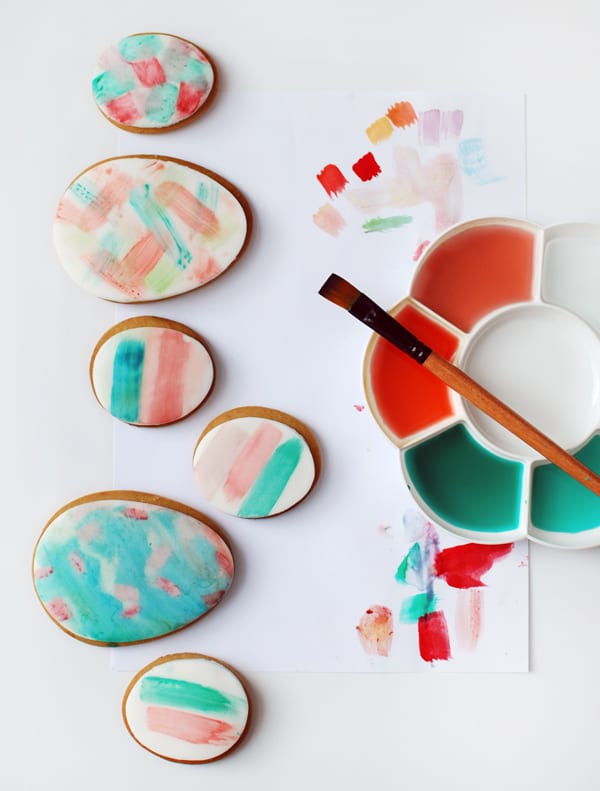
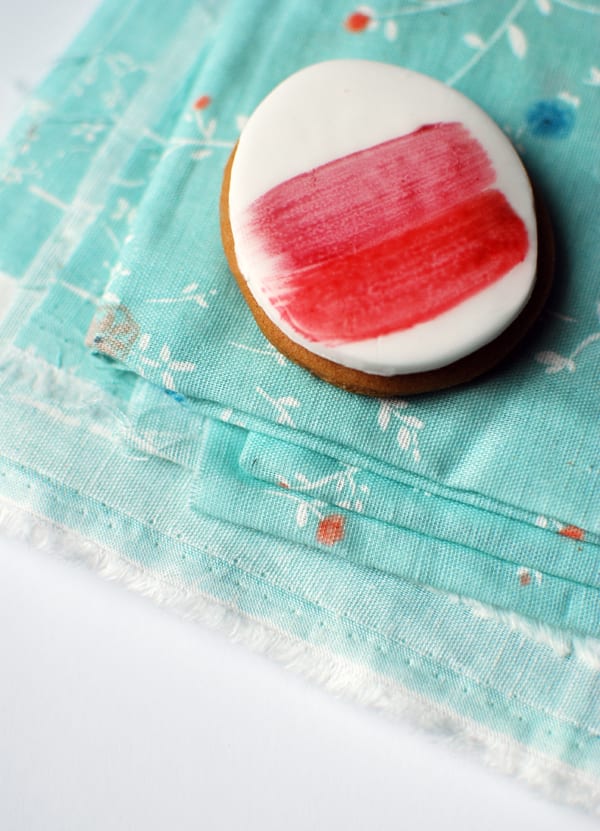
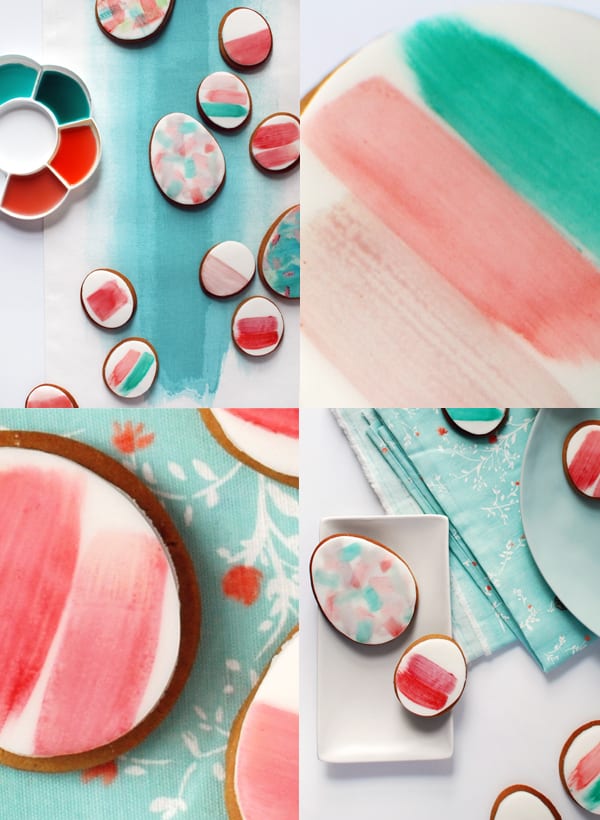
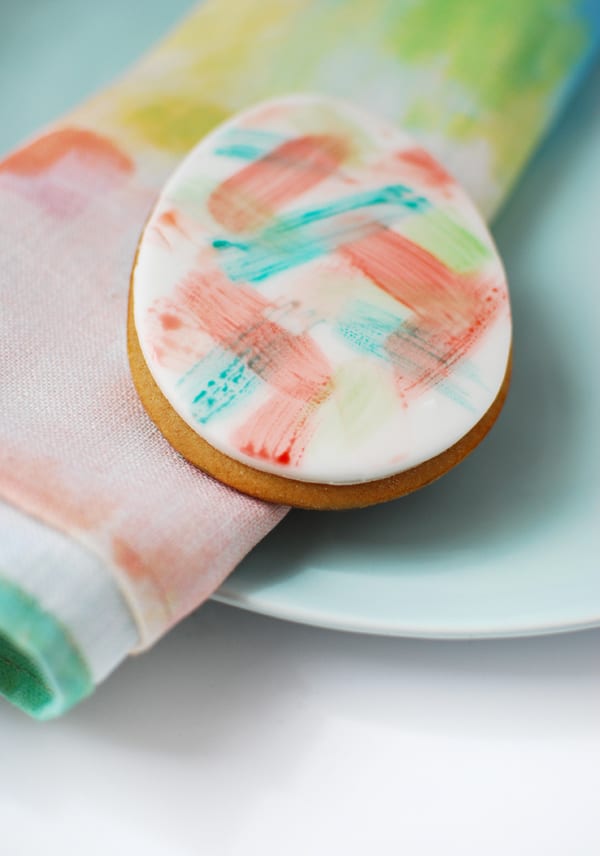
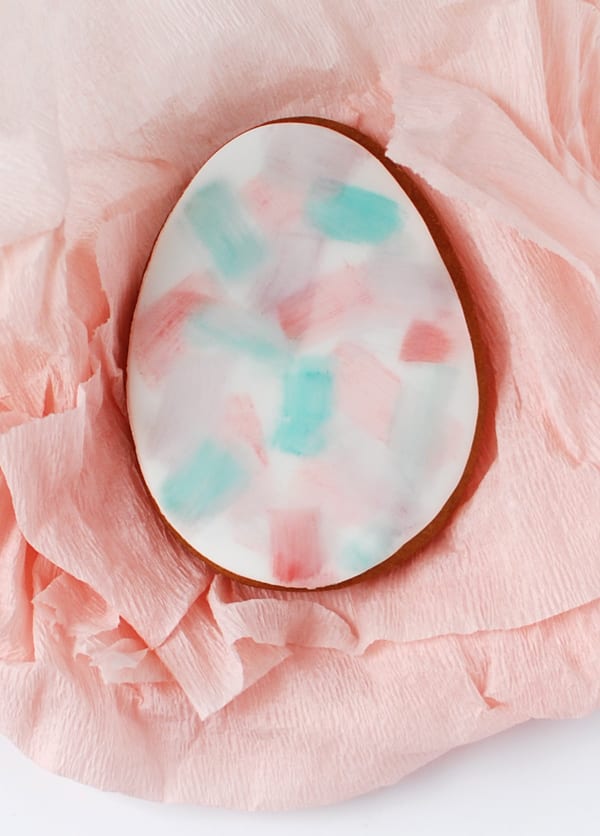 Here’s the recipe I use for gingerbread cookies:
125g butter
1/2 cup (100g) firmly packed brown sugar
1 egg yolk
2.5 cups (375g) plain flour
1 teaspoon bicarbonate of soda
3 teaspoons ground ginger
1/2 cup (125 ml) golden syrup
Step 1
Preheat oven to 180 degrees C.
Beat butter, sugar and yolk in a small bowl with electric mixer until smooth. Stir in sifted dry ingredients and golden syrup; mix to a soft dough. Knead gently on a lightly floured surface until smooth. Roll dough between sheets of baking paper until 3mm thick.
Step 2
Cut gingerbread shapes from dough. Sprinkle more flour if it’s sticky, and flour your cutters and rolling pin if necessary. If dough is too crumbly and difficult to work with, bundle it up in some cling wrap and pop it in the fridge for a couple of hours (or leave it to rest in the fridge overnight). It will be much easier to work with when it’s firmed up a little.
Step 3
Place gingerbread shapes about 3cm apart on paper baking (you may need to carefully transfer them with a spatula to retain the shape). Bake in a moderate oven for about 10 minutes or until lightly browned. Cool on trays.
Now your cookies are ready to decorate with royal icing and watercolour!
Here’s the recipe I use for gingerbread cookies:
125g butter
1/2 cup (100g) firmly packed brown sugar
1 egg yolk
2.5 cups (375g) plain flour
1 teaspoon bicarbonate of soda
3 teaspoons ground ginger
1/2 cup (125 ml) golden syrup
Step 1
Preheat oven to 180 degrees C.
Beat butter, sugar and yolk in a small bowl with electric mixer until smooth. Stir in sifted dry ingredients and golden syrup; mix to a soft dough. Knead gently on a lightly floured surface until smooth. Roll dough between sheets of baking paper until 3mm thick.
Step 2
Cut gingerbread shapes from dough. Sprinkle more flour if it’s sticky, and flour your cutters and rolling pin if necessary. If dough is too crumbly and difficult to work with, bundle it up in some cling wrap and pop it in the fridge for a couple of hours (or leave it to rest in the fridge overnight). It will be much easier to work with when it’s firmed up a little.
Step 3
Place gingerbread shapes about 3cm apart on paper baking (you may need to carefully transfer them with a spatula to retain the shape). Bake in a moderate oven for about 10 minutes or until lightly browned. Cool on trays.
Now your cookies are ready to decorate with royal icing and watercolour!
 By
By