
14
Oct
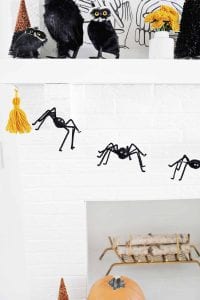
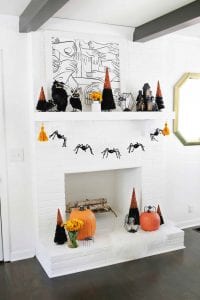
Easy Spider Garland DIY
Categories:
Inspiration
Meskipun tidak merayakan halloween tidak ada salahnya membuat hiasan rumah bersama Anak yang bertemakan halloween.
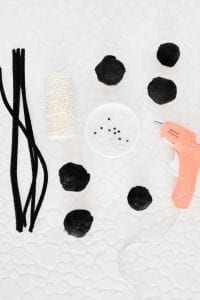
 Supplies:
–black pom poms (I used 2″ pom poms but they can be varying sizes)
–black pipe cleaners (4 per spider)
–hot glue gun
–small googly eyes
–bakers twine and large eye needle
–yarn for tassels
Supplies:
–black pom poms (I used 2″ pom poms but they can be varying sizes)
–black pipe cleaners (4 per spider)
–hot glue gun
–small googly eyes
–bakers twine and large eye needle
–yarn for tassels
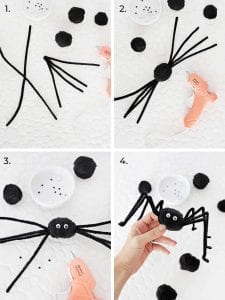
 First, take two pipe cleaners and twist them together in the middle, creating an “X” shape. Fold the X in half so you have 4 legs of equal length. Repeat with two more pipe cleaners so you have two sets of legs. Next, part the furryness of your pom pom and put a large drop of hot glue near the center. Stick the twisted side of your legs into the glue and allow the glue to set. Repeat on the opposite side with your second set of legs. Next, use a small drop of glue on the back of each googly eye and attach them to your spider face. To finish, bend your legs upwards right next to the base of the pipe cleaners, then bend them back down about 1/3 of the way up the leg. Bend the last 1/2″ of each pipe cleaner back up again to create the feet and repeat on the other side.
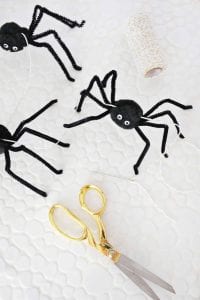 To hang your garland, thread some baker’s twine through a large eye needle and sew through each spider’s core so they are suspended on the string (try and get them near the top of their core so they don’t flip upside down). Once all your spiders are threaded, use some hooks to hang your garland in your desired spot and make some yarn tassels to hang on each end. That’s it!
 Article Source : https://abeautifulmess.com/2018/10/easy-spider-garland-diy.html [ ... ]
Read More
Supplies:
–black pom poms (I used 2″ pom poms but they can be varying sizes)
–black pipe cleaners (4 per spider)
–hot glue gun
–small googly eyes
–bakers twine and large eye needle
–yarn for tassels
First, take two pipe cleaners and twist them together in the middle, creating an “X” shape. Fold the X in half so you have 4 legs of equal length. Repeat with two more pipe cleaners so you have two sets of legs. Next, part the furryness of your pom pom and put a large drop of hot glue near the center. Stick the twisted side of your legs into the glue and allow the glue to set. Repeat on the opposite side with your second set of legs. Next, use a small drop of glue on the back of each googly eye and attach them to your spider face. To finish, bend your legs upwards right next to the base of the pipe cleaners, then bend them back down about 1/3 of the way up the leg. Bend the last 1/2″ of each pipe cleaner back up again to create the feet and repeat on the other side.
To hang your garland, thread some baker’s twine through a large eye needle and sew through each spider’s core so they are suspended on the string (try and get them near the top of their core so they don’t flip upside down). Once all your spiders are threaded, use some hooks to hang your garland in your desired spot and make some yarn tassels to hang on each end. That’s it!
Article Source : https://abeautifulmess.com/2018/10/easy-spider-garland-diy.html [ ... ] 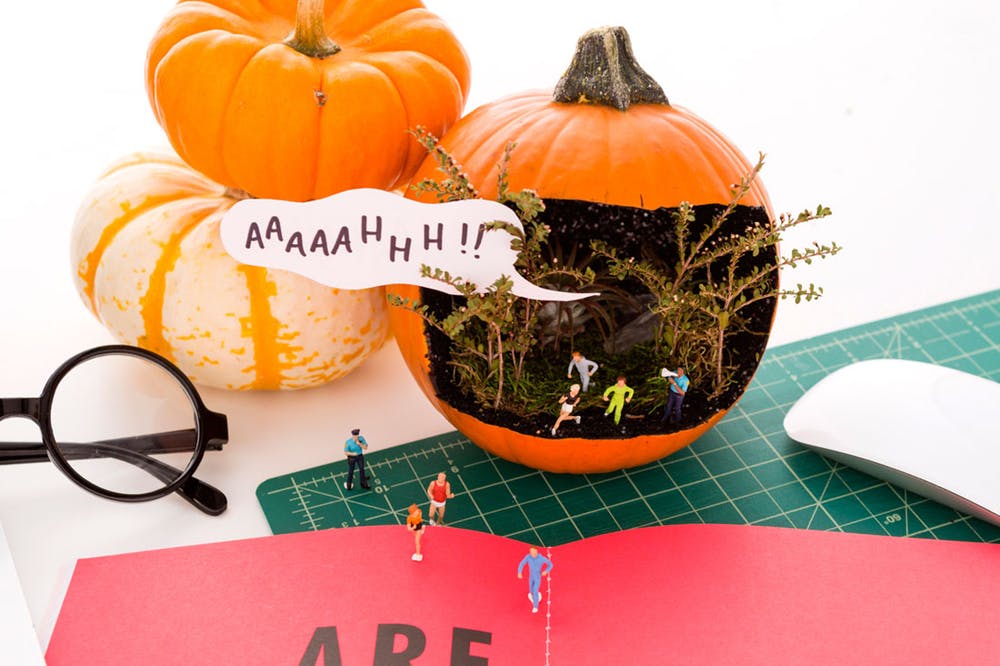
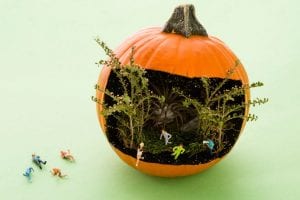
 This tiny pumpkin diorama is the perfect office desk decor. It says “I appreciate Halloween” without completely letting your freak flag fly. Subtlety is key with the ‘ween decor.
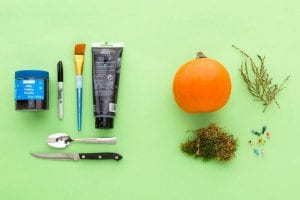 Materials and Tools:
glitter
permanent marker
paint brush
black acrylic paint
spoon
knife
mini pumpkin
moss and dried foliage
model people
Grab your materials. It’s time to whip out those fine motor skills!
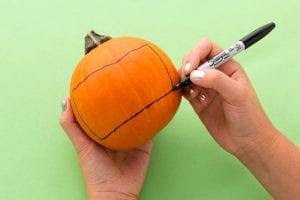
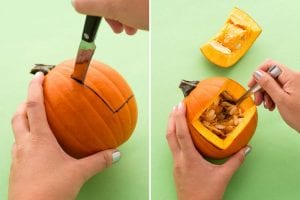
1. Make a rectangle using permanent marker.
Materials and Tools:
glitter
permanent marker
paint brush
black acrylic paint
spoon
knife
mini pumpkin
moss and dried foliage
model people
Grab your materials. It’s time to whip out those fine motor skills!
1. Make a rectangle using permanent marker.
 2. Using a serrated knife, carefully cut along your lines. Remove the seeds with a spoon, making sure to scrape away as much of the loose pumpkin fibers as possible. Pat the inside of the pumpkin dry with a paper towel.
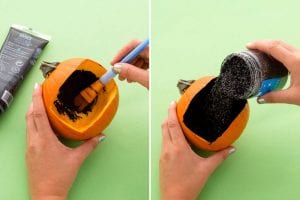
 3. Paint the inside of the pumpkin with the black acrylic paint and add glitter while the paint is still wet. Allow the paint to dry completely (about two hours) before moving onto the next step.
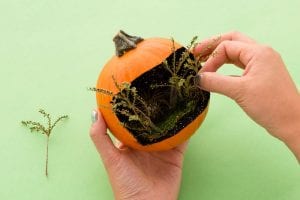
 4. Place a layer of moss on the bottom of the pumpkin and trim your dried botanicals to fit inside of the pumpkin. Pierce twigs into the flesh of the pumpkin to keep them in place.
 5. When you’re happy with your composition, place a few model people into your diorama. I purchased jogging figurines and policemen to create a spooky chase scene.
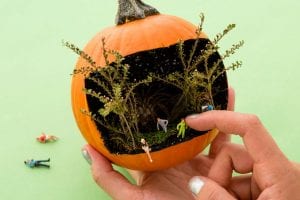 6. That’s all it takes to make a spooky mini Jack-o’-Lantern that’s perfect for your desk.
 Article Source : https://www.brit.co/stranger-things-are-happening-in-this-diy-mini-jack-o-lantern-diorama/ [ ... ]
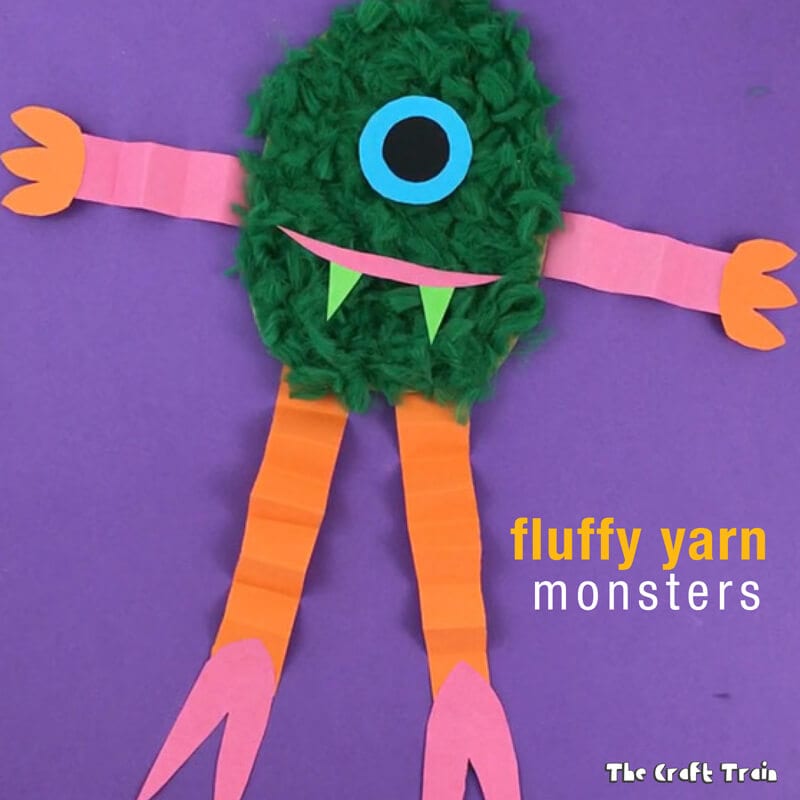
 You will need:
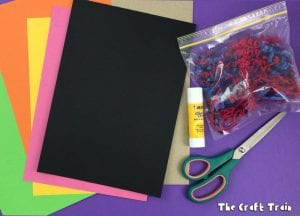
• pom pom trimmings
• scrap heavy cardboard
• construction paper
• a glue stick
• PVA or craft glue
You will need:
• pom pom trimmings
• scrap heavy cardboard
• construction paper
• a glue stick
• PVA or craft glue
 How to:
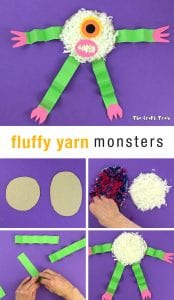
1. Sketch and cut out a circular or oval shape on your piece of scrap cardboard.
2. Spread some craft glue evenly on your cardboard shape, making sure its all covered completely with a paint brush.
3. Spread some pom pom trimmings across the shape evenly, making sure to leave no gaps and go right to the edges. Leave aside to dry.
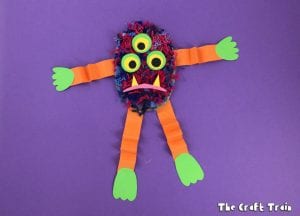
4. Cut four strips from a sheet of construction paper and fold them backwards and forwards concertina-style to create arms and legs.
5. Cut hand and foot shapes from construction paper and glue to the ends of the strips.
6. Glue the ends of the arms and legs to the reverse side of the fluffy cardboard piece.
7. Cut out three circles, each a different size, and glue on top of each other to create an eye. Make as many eyes as you want and then glue them to the top of the fluff with your glue stick.
8. Cut out a mouth and teeth, and glue to the top of the fluff.
How to:
1. Sketch and cut out a circular or oval shape on your piece of scrap cardboard.
2. Spread some craft glue evenly on your cardboard shape, making sure its all covered completely with a paint brush.
3. Spread some pom pom trimmings across the shape evenly, making sure to leave no gaps and go right to the edges. Leave aside to dry.
4. Cut four strips from a sheet of construction paper and fold them backwards and forwards concertina-style to create arms and legs.
5. Cut hand and foot shapes from construction paper and glue to the ends of the strips.
6. Glue the ends of the arms and legs to the reverse side of the fluffy cardboard piece.
7. Cut out three circles, each a different size, and glue on top of each other to create an eye. Make as many eyes as you want and then glue them to the top of the fluff with your glue stick.
8. Cut out a mouth and teeth, and glue to the top of the fluff.
 Source Article : https://www.thecrafttrain.com/fluffy-yarn-monsters/
[ ... ]
Source Article : https://www.thecrafttrain.com/fluffy-yarn-monsters/
[ ... ] 
 You will need
• heavy recycled cardboard – for example a flap from a cardboard box
• cookie cutters for shapes
• cotton balls for stuffing
• glue stick
• assorted coloured tissue paper
• brown paper (we used paper bags)
• dark brown construction paper for the choc-chips
• mod podge
• glitter to decorate
• cutting mat and craft knife for the jam tart window
How To
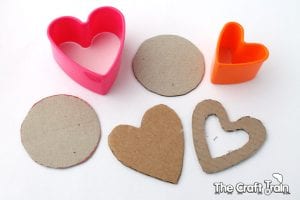
Trace the cookie cutter shapes onto your cardboard and cut them out. To make a heart-shaped tart you will need to cut a window inside one of the heart shapes and cut a second one the same size with no window for the back of the cookie. To cut the window I used a craft knife and cutting mat to make the job easier, but obviously that equipment wouldn’t be safe for a child to use so you would need to do that part for them.
You will need
• heavy recycled cardboard – for example a flap from a cardboard box
• cookie cutters for shapes
• cotton balls for stuffing
• glue stick
• assorted coloured tissue paper
• brown paper (we used paper bags)
• dark brown construction paper for the choc-chips
• mod podge
• glitter to decorate
• cutting mat and craft knife for the jam tart window
How To
Trace the cookie cutter shapes onto your cardboard and cut them out. To make a heart-shaped tart you will need to cut a window inside one of the heart shapes and cut a second one the same size with no window for the back of the cookie. To cut the window I used a craft knife and cutting mat to make the job easier, but obviously that equipment wouldn’t be safe for a child to use so you would need to do that part for them.
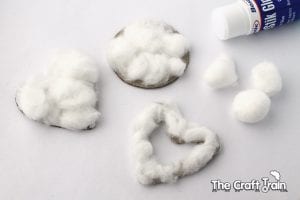
 Glue the cotton balls onto the cardboard, you will need to gently pull them apart a bit to get a nice even coverage. When the girls made some cookies they found this bit quite tricky and needed some help, the cotton balls kept sticking to the glue on their fingers (which you can imagine is quite frustrating!).
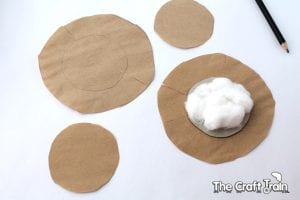
 Now it’s time to wrap the cookies in paper. Sketch around the cookie shape over the paper that you will be using, giving it a fair bit of space to cover the whole cookie like in the picture below. Cut a few slits around the edge. Then turn the cotton ball side so it’s facing down, wrap the cookie and glue the flaps down. This technique goes for any shape of cookie except for the jam tart.
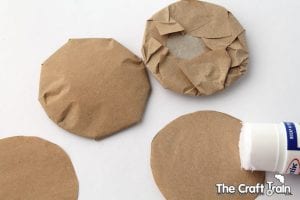
 Once you’ve glued down the flaps, cover the base with a flat piece of the right shape to tidy it up.
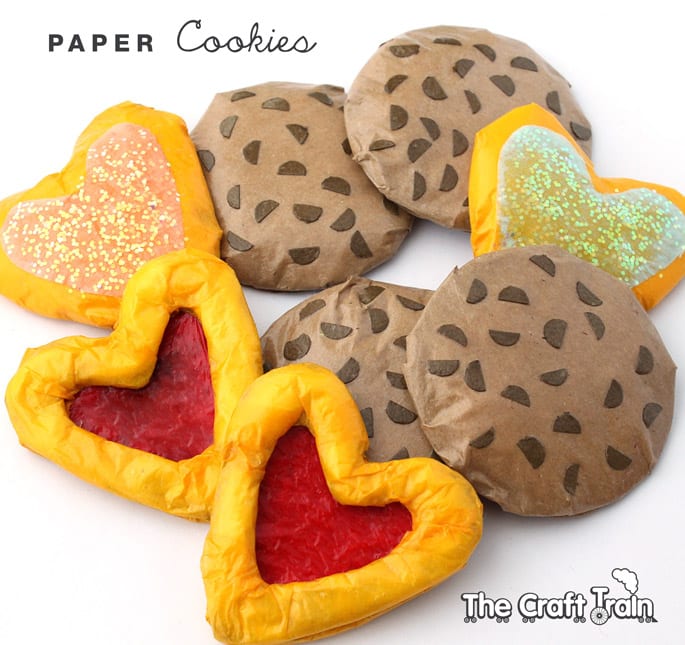
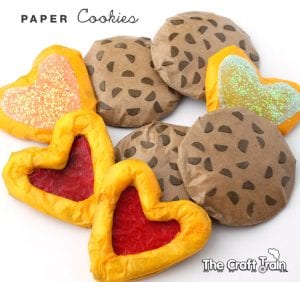
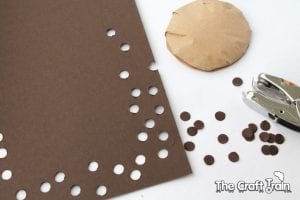
 Make choc-chips by using a hole punch over your dark brown construction paper. Empty out the punched hole circles and cut them in half before gluing onto your cookie.
 To create coloured icing cut a smaller shape of the same shape as the cookie (in this case a heart) and stick that on with your glue stick.
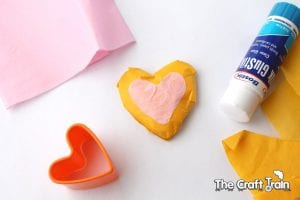 To make the jam tarts I covered the heart-shaped window with multiple small rectangular strips of tissue paper, and the base of the cookie that will be seen through the window with a piece of yellow tissue paper on the back and a piece of red construction paper or similar to make the ‘jam’ on the top (which you see through the window).
Once you have covered all off your ‘cookies’ in paper it’s time to paint them with mod podge for a glossy, protective coating. You might need to paint one side, dry, then turn over and coat the other side. On most of the cookies I made I didn’t bother mod-podging the back since it would take up extra drying time and I know my girls will be careful with them so they shouldn’t get destroyed. To stop the mod podge from sticking to the surface it’s sitting on whilst it’s drying, place it on top of some non-stick baking paper – just like real cookies!
For the hearts that have icing I added an extra coat of mod podge once the first one was dry directly over the piece of icing only, and then sprinkled that liberally with glitter.
The girls really loved these cookies and wanted to have a turn at making some too, so I set the activity up for them again at a later date when I could concentrate on helping and enjoying our crafting time together instead of madly taking photos. They found it tricky in parts but to their credit they both persevered and created some cute little cookies of their own. If you have younger children I’d recommend keeping the shapes simple (like circles or rectangles) because the stars and hearts are fiddly and it might be a bit too hard for little fingers.
Source Article : https://www.thecrafttrain.com/paper-cookies/ [ ... ]
To make the jam tarts I covered the heart-shaped window with multiple small rectangular strips of tissue paper, and the base of the cookie that will be seen through the window with a piece of yellow tissue paper on the back and a piece of red construction paper or similar to make the ‘jam’ on the top (which you see through the window).
Once you have covered all off your ‘cookies’ in paper it’s time to paint them with mod podge for a glossy, protective coating. You might need to paint one side, dry, then turn over and coat the other side. On most of the cookies I made I didn’t bother mod-podging the back since it would take up extra drying time and I know my girls will be careful with them so they shouldn’t get destroyed. To stop the mod podge from sticking to the surface it’s sitting on whilst it’s drying, place it on top of some non-stick baking paper – just like real cookies!
For the hearts that have icing I added an extra coat of mod podge once the first one was dry directly over the piece of icing only, and then sprinkled that liberally with glitter.
The girls really loved these cookies and wanted to have a turn at making some too, so I set the activity up for them again at a later date when I could concentrate on helping and enjoying our crafting time together instead of madly taking photos. They found it tricky in parts but to their credit they both persevered and created some cute little cookies of their own. If you have younger children I’d recommend keeping the shapes simple (like circles or rectangles) because the stars and hearts are fiddly and it might be a bit too hard for little fingers.
Source Article : https://www.thecrafttrain.com/paper-cookies/ [ ... ] 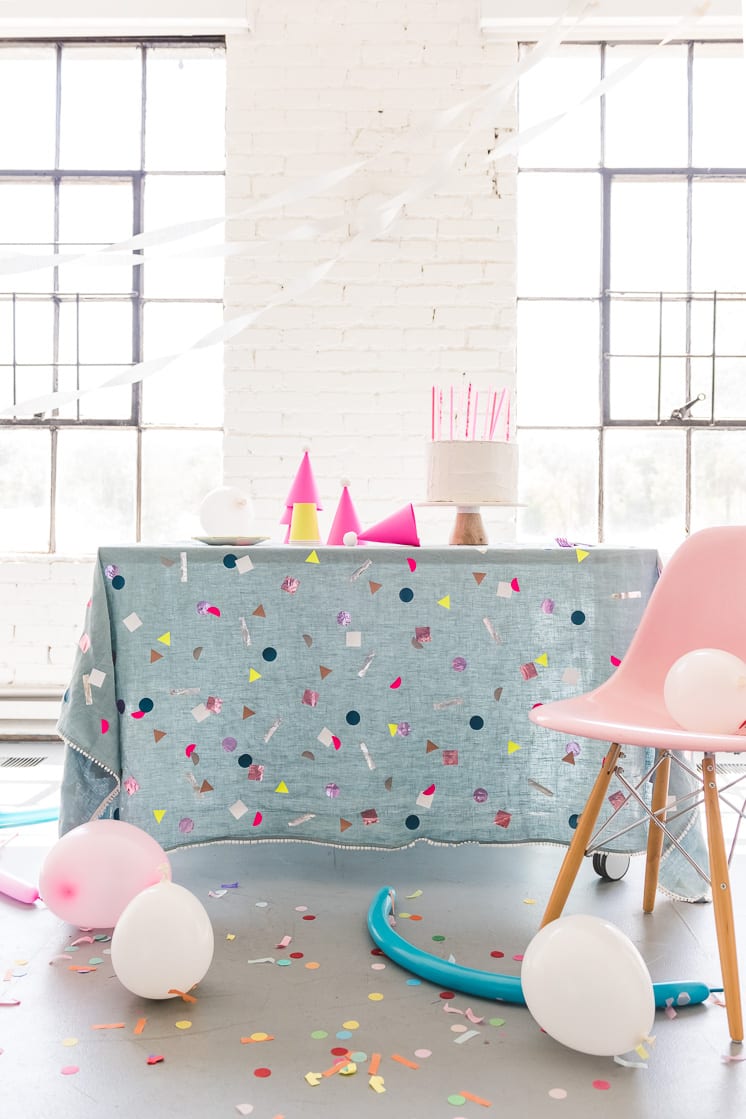
 Materials:
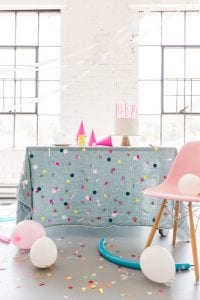
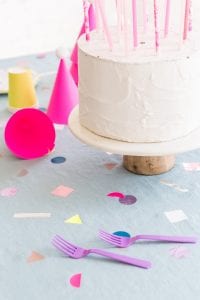
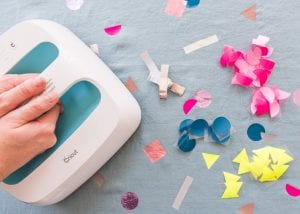
•Iron-on Vinyl in Silver, Rose Gold, Neon Yellow, Neon Pink, Gray, Teal, Lilac, Beige, White
•Tablecloth; these linen ones are beautiful! *Wash your tablecloth beforehand*
•Cricut Maker or scissors
•Iron or Easy Press
•Ironing board or mat
•Confetti Shape Templates for Cricut, Or Templates to hand cut
Materials:
•Iron-on Vinyl in Silver, Rose Gold, Neon Yellow, Neon Pink, Gray, Teal, Lilac, Beige, White
•Tablecloth; these linen ones are beautiful! *Wash your tablecloth beforehand*
•Cricut Maker or scissors
•Iron or Easy Press
•Ironing board or mat
•Confetti Shape Templates for Cricut, Or Templates to hand cut

 Source Article : http://thehousethatlarsbuilt.com/2018/09/diy-confetti-tablecloth.html/#more-34361 [ ... ]
 Supplies:
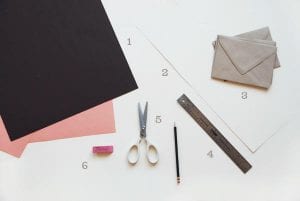 Directions:
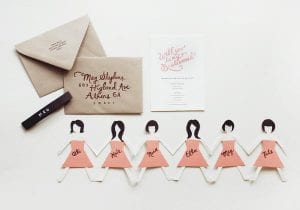
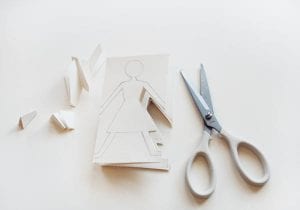
1. First, be sure that your chain will fit in the envelope you chose. I decided to make my chain about 6 inches tall and 3.5 inches wide to fit in an A7 envelope. Draw tick marks every 3.5 inches (or whatever width you chose) on the top and bottom of the paper for how many people you want to cut out (I chose 6).
Directions:
1. First, be sure that your chain will fit in the envelope you chose. I decided to make my chain about 6 inches tall and 3.5 inches wide to fit in an A7 envelope. Draw tick marks every 3.5 inches (or whatever width you chose) on the top and bottom of the paper for how many people you want to cut out (I chose 6).
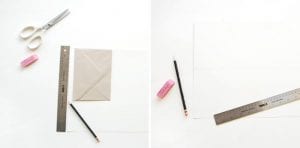 2. Cut out your rectangle and score the paper vertically between each set of tick marks. This will make folding easier and more accurate. Then, fold the paper accordion style.
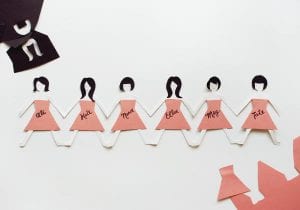
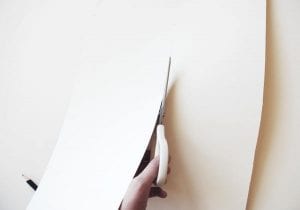 3. On the top of the stack draw the shape of your person. Be sure to draw the arms and legs to the edge of the paper so that they will be attached into a chain after you cut it out.
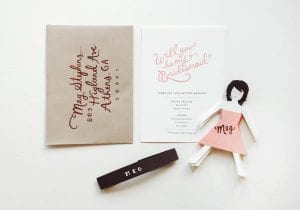
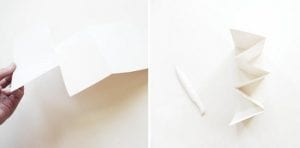 4. Next, cut out the person shape and open up your masterpiece chain! Decorate your ladies with dresses of your choice and different hairstyles to personalize them. I also drew faces and painted their names on each one.
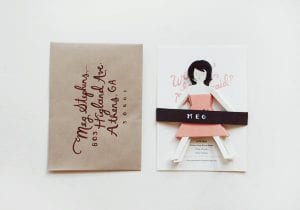
 5. To complete the set I wrapped a band of paper around the chain and information card and wrote the name of the person I was to be sending it to.

 Source Article : https://www.oncewed.com/diy-wedding-blog/diy-bridesmaids-cards/
[ ... ]
Source Article : https://www.oncewed.com/diy-wedding-blog/diy-bridesmaids-cards/
[ ... ] 
 INGREDIENTS
1 1/2 cups all-purpose flour
1 tablespoon baking powder
2 sticks unsalted butter, room temperature
4 large eggs
1 1/4 cups whole milk
Simple Vanilla Frosting
1 1/2 cups cake flour (not self-rising)
Salt
1 3/4 cups sugar
2 teaspoons pure vanilla extract
2 1/4 cups
INGREDIENTS
1 1/2 cups all-purpose flour
1 tablespoon baking powder
2 sticks unsalted butter, room temperature
4 large eggs
1 1/4 cups whole milk
Simple Vanilla Frosting
1 1/2 cups cake flour (not self-rising)
Salt
1 3/4 cups sugar
2 teaspoons pure vanilla extract
2 1/4 cups 
 •1 cup whole milk
•1 cup ice cubes
•1 frozen banana, peeled & sliced
•1/2 cup crushed tea biscuits (I used Biscoff)
•1/4 cup peanut butter
•2 tablespoons agave
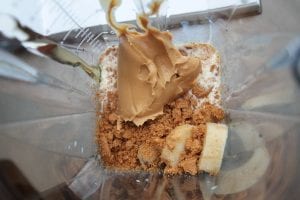
•1 cup whole milk
•1 cup ice cubes
•1 frozen banana, peeled & sliced
•1/2 cup crushed tea biscuits (I used Biscoff)
•1/4 cup peanut butter
•2 tablespoons agave
 Steps:
1 Put all ingredients in the blender. Add the ice.
Steps:
1 Put all ingredients in the blender. Add the ice.
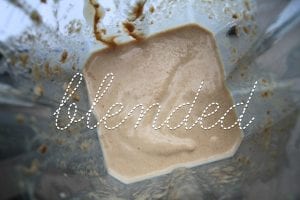
 2 BLEND!
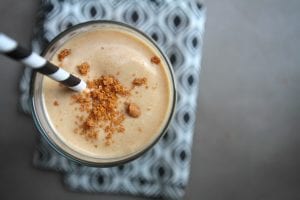
 3 Pour smoothie into two glasses…or one big TALL one like mine.
 4 Plop in a straw.
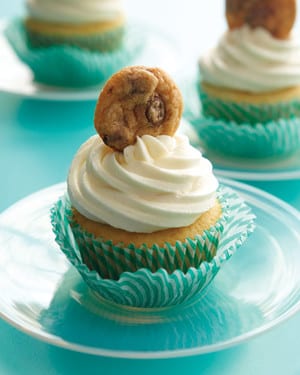
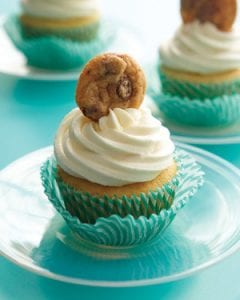
5 Crumble some cookie crumbs on top and dip a rogue cookie in. (try with cookies box product)
4 Plop in a straw.
5 Crumble some cookie crumbs on top and dip a rogue cookie in. (try with cookies box product)
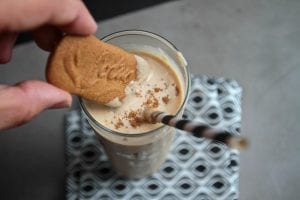 6 I swear it could be breakfast, lunch, dinner AND dessert.
Source Article : http://www.shutterbean.com/2013/milk-cookies-smoothie/ [ ... ]
6 I swear it could be breakfast, lunch, dinner AND dessert.
Source Article : http://www.shutterbean.com/2013/milk-cookies-smoothie/ [ ... ]  Tutorial :
1. Trace their outstretched arms to create a giant tangible “hug” that you can roll up
2. Mail to them.
Tutorial :
1. Trace their outstretched arms to create a giant tangible “hug” that you can roll up
2. Mail to them.
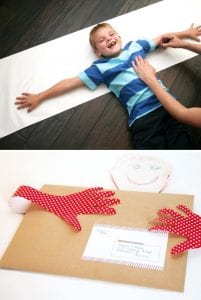 Suorce article : https://pagingsupermom.com/send-hug// [ ... ]
 The Supplies:
•
The Supplies:
• •Alcohol inks (
 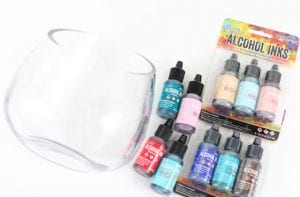 Steps :
1. Once you have all your supplies and your gloves are on (the alcohol inks will stain your hands for a few weeks if you don’t use them!), use the tape to tape off the part of the marble coaster that you don’t want painted and make sure the tape is very well adhered. You will also want to work on a protected surface. I covered my table with plastic wrap to protect it from getting even more paints splatters on it!
Steps :
1. Once you have all your supplies and your gloves are on (the alcohol inks will stain your hands for a few weeks if you don’t use them!), use the tape to tape off the part of the marble coaster that you don’t want painted and make sure the tape is very well adhered. You will also want to work on a protected surface. I covered my table with plastic wrap to protect it from getting even more paints splatters on it!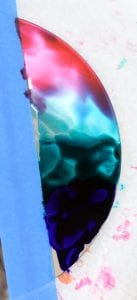 2. Next, drip on your colors in bands onto the exposed part of the coaster. Make sure not to add too much of the alcohol inks, only a few drops should do. Next tip the coaster to let the excess ink drain off onto your protected surface or onto a crumpled up paper towel.
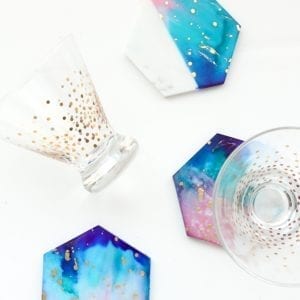
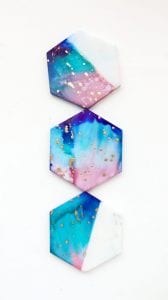
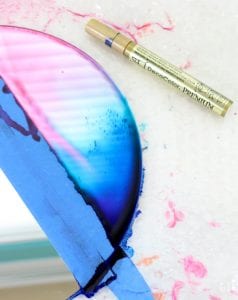 3. Once drained you will get this swirly gradient look on your coasters. The last step is to add a few flecks of gold by shaking your paint pen over the coasters in a downward flicking motion.
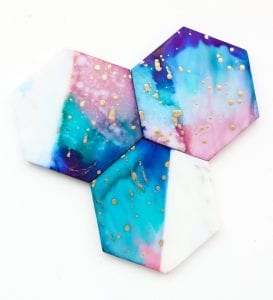 4. Once you have added the flecks, gently peel off the tape and let the ink absorb into the coaster. The last step is to trace the tile on your cork contact paper and adhere the cork to the underside of the tile to create your coaster.
Marble is so absorbent that you don’t have to even seal the ink on, but if you are still worried you can give the coasters a coat of spray varnish to seal them.
In the coaster above you can see a line down one side. This was one where the ink bled under the tape, so I went ahead and made the whole think galaxy. So, make sure your tape is well adhered and you don’t use too much ink to prevent bleeding.
4. Once you have added the flecks, gently peel off the tape and let the ink absorb into the coaster. The last step is to trace the tile on your cork contact paper and adhere the cork to the underside of the tile to create your coaster.
Marble is so absorbent that you don’t have to even seal the ink on, but if you are still worried you can give the coasters a coat of spray varnish to seal them.
In the coaster above you can see a line down one side. This was one where the ink bled under the tape, so I went ahead and made the whole think galaxy. So, make sure your tape is well adhered and you don’t use too much ink to prevent bleeding.
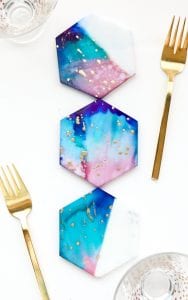 Have you played with alcohol inks before? I have only just dabbled in them and while they are messy, the results are kinda worth it!
Source article : https://akailochiclife.com/2017/06/make-it-galaxy-color-blocked-marble.html
[ ... ]
Have you played with alcohol inks before? I have only just dabbled in them and while they are messy, the results are kinda worth it!
Source article : https://akailochiclife.com/2017/06/make-it-galaxy-color-blocked-marble.html
[ ... ]